English
WT9932S3-NANO Beginner's Guide
Update history
| Date | Version | Author | Update content |
|---|---|---|---|
| 2025-12-18 | 1.0.0 | Win | Initial document release |
Windows/MAC Arduino Environment Setup
For related content, please refer to the official documentation:
https://docs.espressif.com/projects/arduino-esp32/en/latest/installing.html#installing-using-arduino-ide
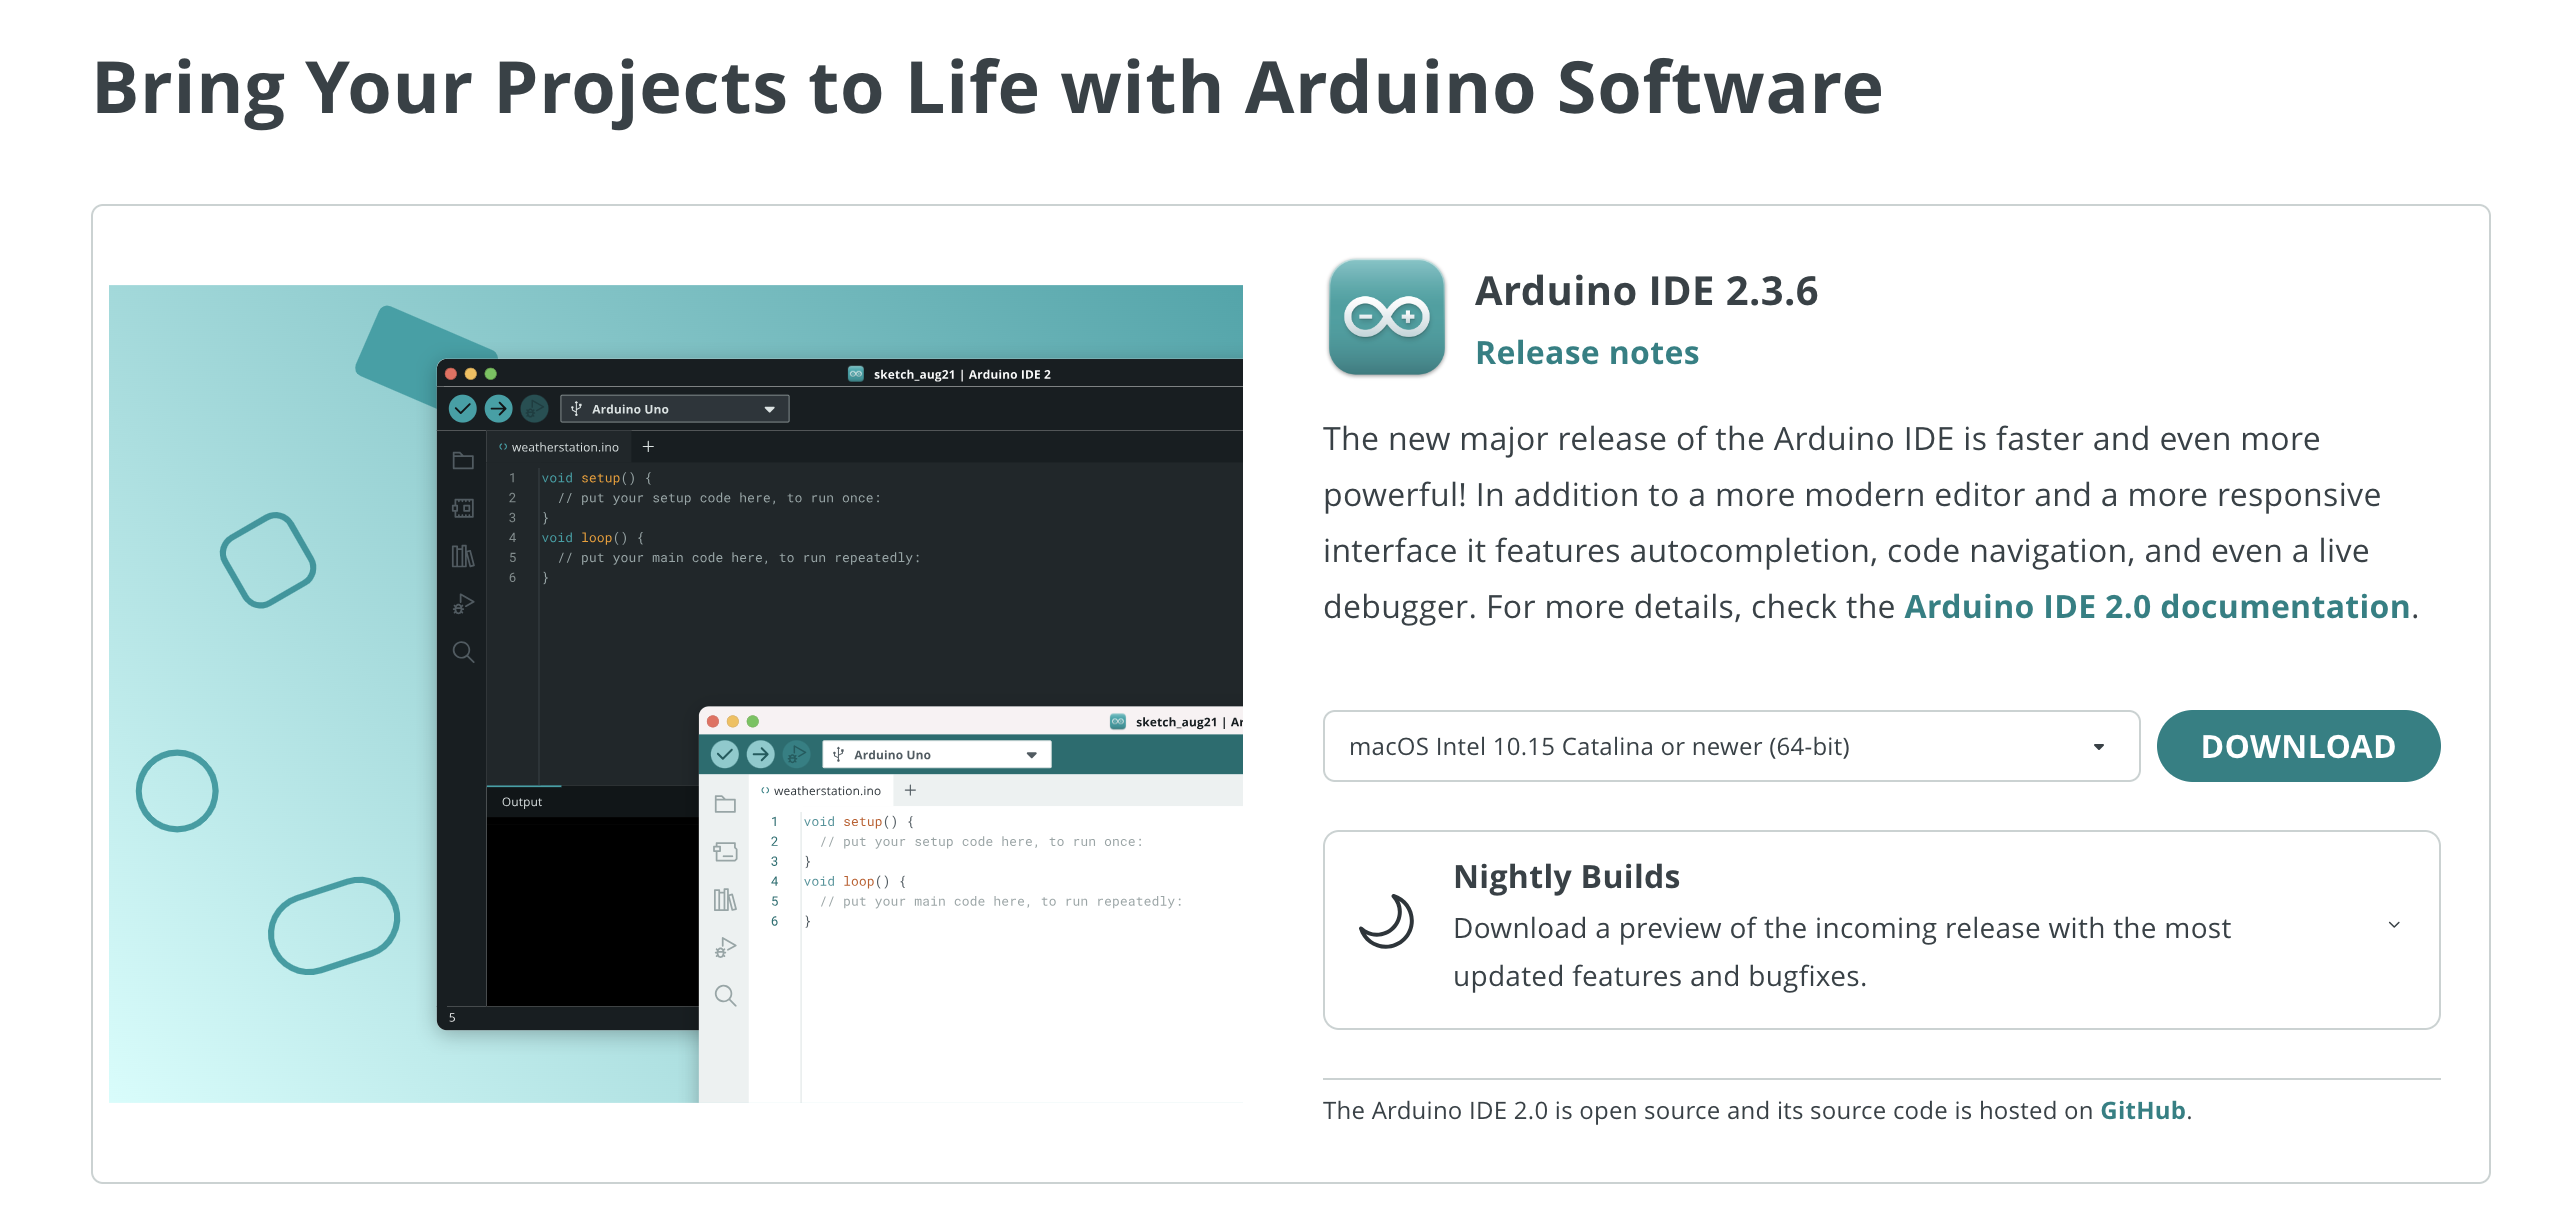
Visit the Arduino official website and download the IDE development tool:
https://www.arduino.cc/en/software/Install the latest IDE. As of 2025.11.01, the latest version is 2.3.6
Install the ESP32 board support package
[Pay attention to the network environment during installation. If the search or installation fails, consider using a domestic mirror.]
Before installing the ESP32 boards, you need to add the ESP32 Board Manager URL in
IDE → Preferences → Settings:
Open Arduino IDE → “File > Preferences”, and enter the official JSON link in
“Additional Boards Manager URLs”
( https://espressif.github.io/arduino-esp32/package_esp32_index.json
or China mirror: https://jihulab.com/esp-mirror/espressif/arduino-esp32/-/raw/gh-pages/package_esp32_index_cn.json )Since the ESP32 toolchain is relatively large, the download may take some time.
Make sure each URL is on a separate line, with no extra spaces or characters.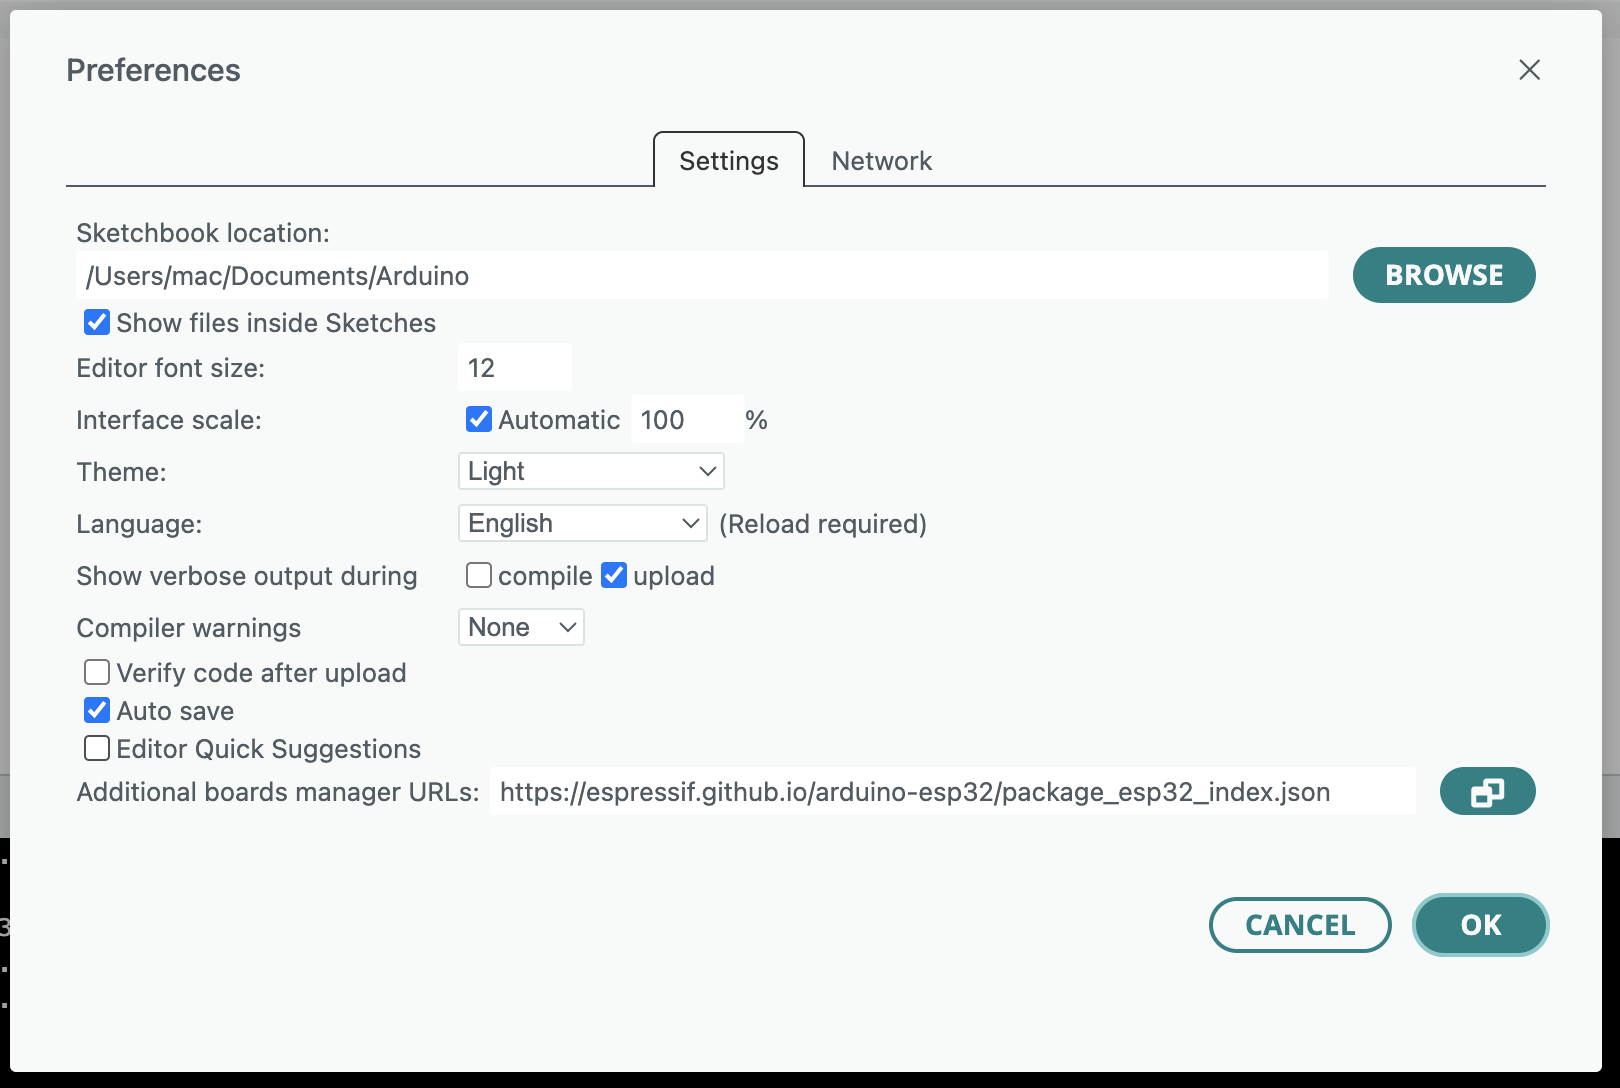
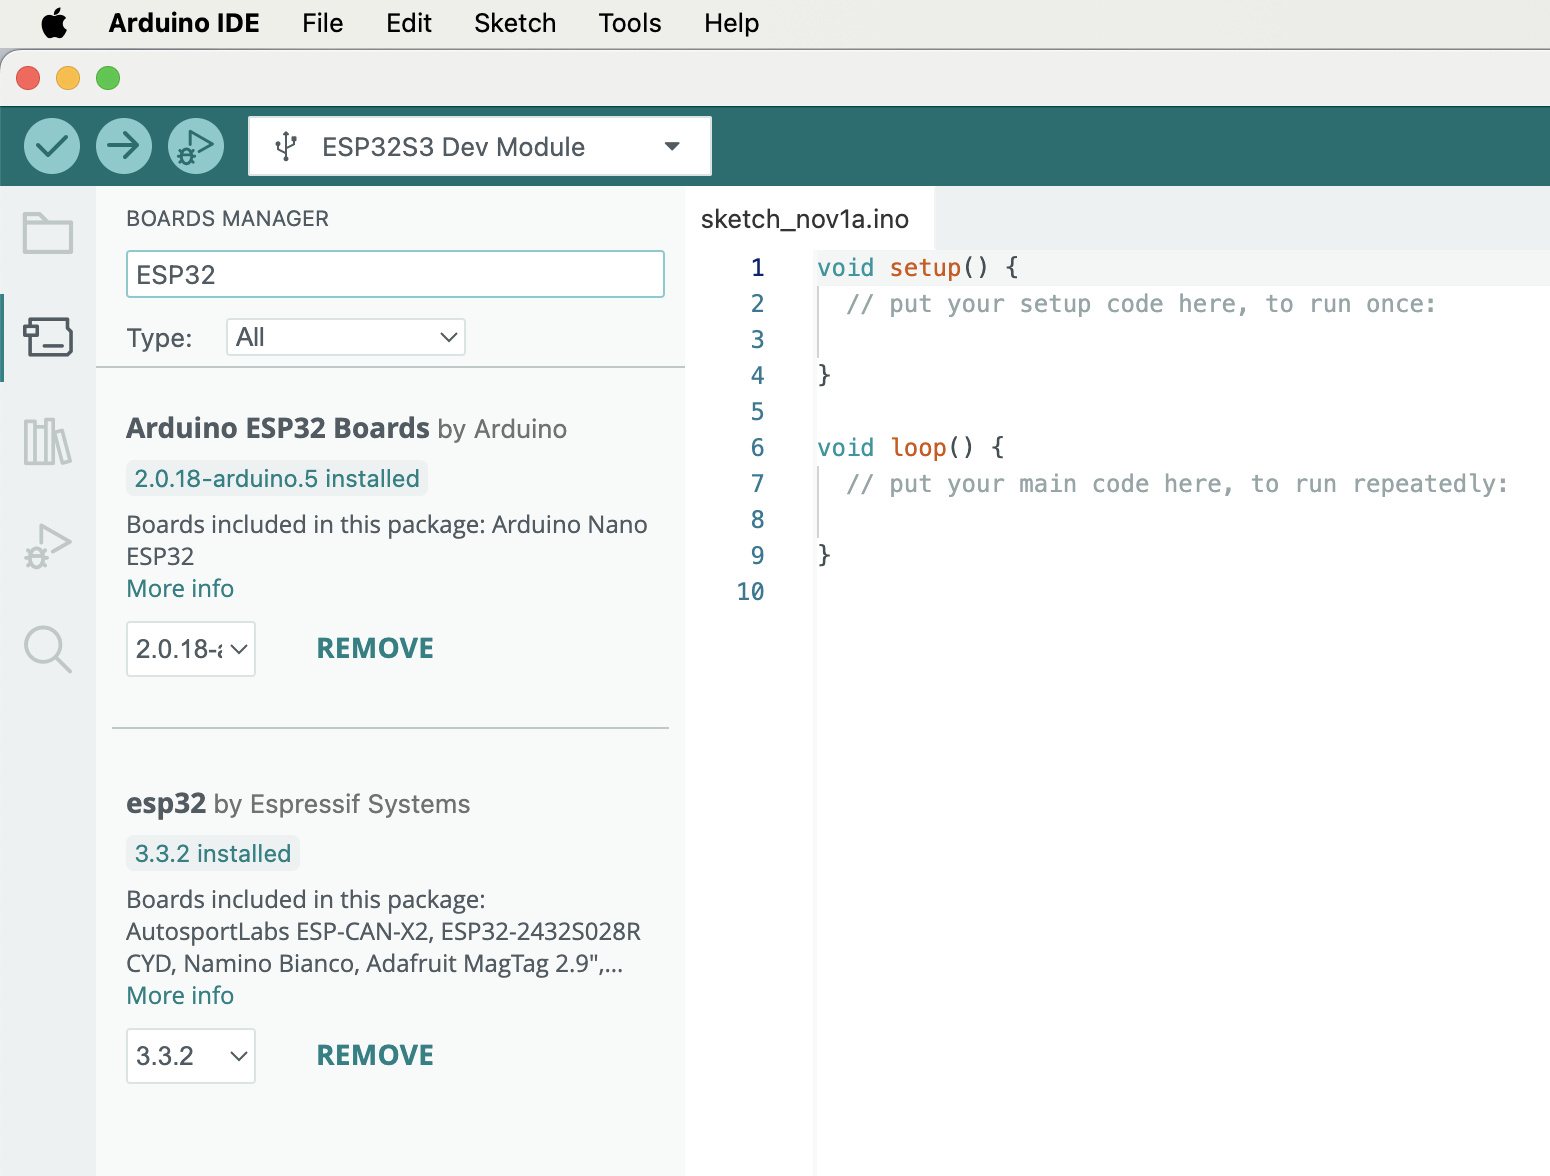
Verify whether the installation is successful
a. Check whether the corresponding development board can be found under
IDE → Tools → Board
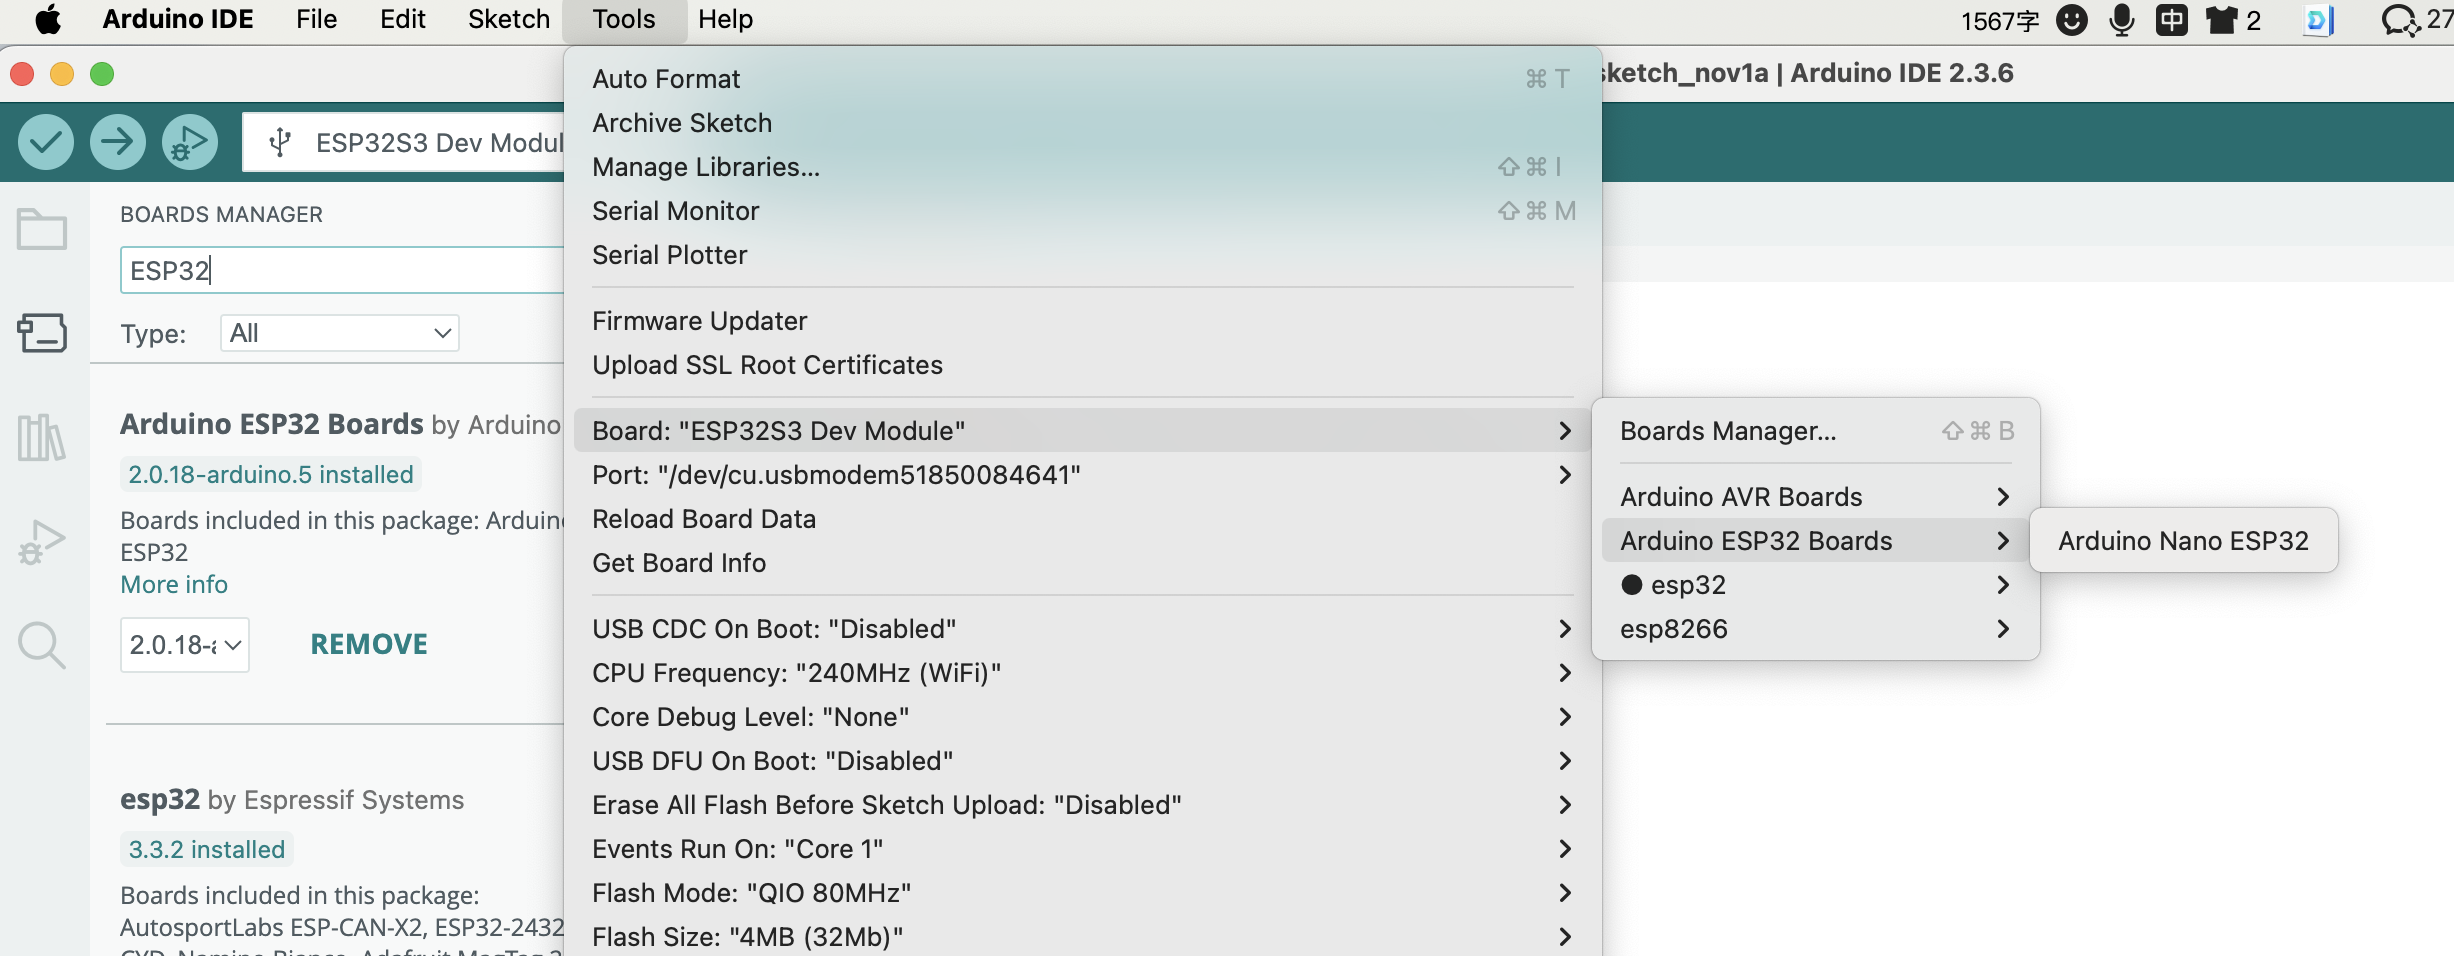
b. After connecting the development board, check whether the corresponding serial port appears
【If it does, the installation is successful】
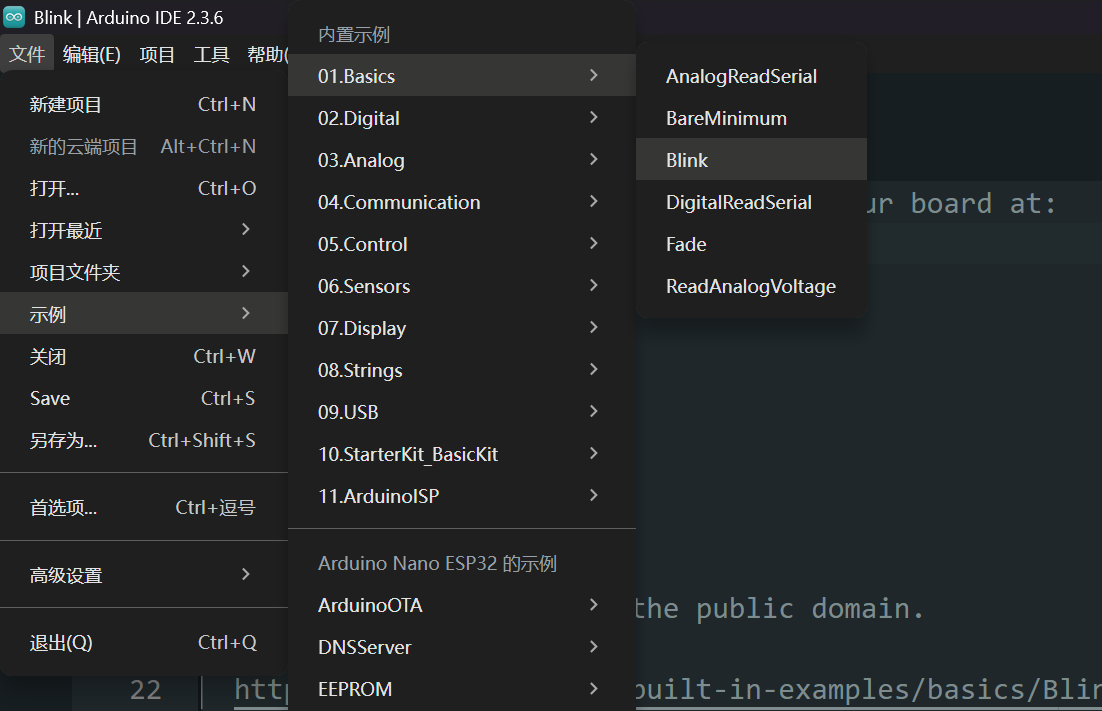
Environment Verification – Blink LED Example
Arduino IDE → File → Examples → 01 Basics → Blink
/*  https://docs.arduino.cc/built-in-examples/basics/Blink/
*/

// the setup function runs once when you press reset or power the board
void setup() {
  // initialize digital pin LED_BUILTIN as an output.
  pinMode(LED_BUILTIN, OUTPUT);
}

// the loop function runs over and over again forever
void loop() {
  digitalWrite(LED_BUILTIN, HIGH);  // turn the LED on (HIGH is the voltage level)
  delay(1000);                      // wait for a second
  digitalWrite(LED_BUILTIN, LOW);   // turn the LED off by making the voltage LOW
  delay(1000);                      // wait for a second
}
Compile and upload directly.
If it compiles successfully, uploads to the Arduino board correctly, and the LED blinks normally, the verification is passed.
A normal upload and flashing log is shown below:
Opening DFU capable USB device...
Device ID 2341:0070
Device DFU version 0101
Claiming USB DFU Interface...
Setting Alternate Interface #0 ...
Determining device status...
DFU state(2) = dfuIDLE, status(0) = No error condition is present
DFU mode device DFU version 0101
Device returned transfer size 4096
Copying data from PC to DFU device

Download	[                         ]   0%            0 bytes
Download	[=                        ]   4%        12288 bytes
Download	[=                        ]   5%        16384 bytes
Download	[==                       ]   8%        24576 bytes
Download	[===                      ]  12%        36864 bytes
Download	[====                     ]  16%        49152 bytes
Download	[=====                    ]  21%        61440 bytes
Download	[======                   ]  25%        73728 bytes
Download	[=======                  ]  28%        81920 bytes
Download	[========                 ]  32%        94208 bytes
Download	[=========                ]  36%       106496 bytes
Download	[==========               ]  40%       118784 bytes
Download	[===========              ]  45%       131072 bytes
Download	[===========              ]  47%       139264 bytes
Download	[============             ]  49%       143360 bytes
Download	[=============            ]  52%       151552 bytes
Download	[==============           ]  56%       163840 bytes
Download	[===============          ]  60%       176128 bytes
Download	[================         ]  64%       188416 bytes
Download	[=================        ]  69%       200704 bytes
Download	[==================       ]  73%       212992 bytes
Download	[===================      ]  76%       221184 bytes
Download	[====================     ]  80%       233472 bytes
Download	[=====================    ]  84%       245760 bytes
Download	[======================   ]  88%       258048 bytes
Download	[=======================  ]  92%       270336 bytes
Download	[======================== ]  97%       282624 bytes
Download	[=========================] 100%       286592 bytes
Download done.
DFU state(7) = dfuMANIFEST, status(0) = No error condition is present
DFU state(2) = dfuIDLE, status(0) = No error condition is present
Done!