English
WT9932C2-TINY Beginner's Guide
Update history
| Date | Version | Author | Update content |
|---|---|---|---|
| 2025-12-05 | 1.0.0 | Kirto | Initial document release |
1. Setting Up the ESP32-C2 Development Environment
This tutorial describes how to build the ESP-IDF environment on Windows using WSL2.
The main advantages are:
- Compiling in Ubuntu is faster than compiling directly on Windows
- WSL2 uses Windows resources more efficiently than a full virtual machine
- File exchange between Windows and WSL2 is seamless and easier than with a VM
1.1 Preparation
- An ESP32-C2 development board
- A USB data cable (USB-A to Type-C)
- A computer running Windows, Linux, or macOS
1.2 Installing WSL2
Open Command Prompt or PowerShell as Administrator.
Enter the following command:
wsl --install
⚠ Note: You must restart your computer for the installation to take effect.
The system will automatically install all required components and set up the Ubuntu distribution by default.
Install usbipd for forwarding USB devices to WSL:
Download WSL-USB-GUI:
https://gitlab.com/alelec/wsl-usb-gui/-/releases
DownloadWSL-USB-x.x.x.msiand double-click to install.
1.3 Installing ESP-IDF
- Install required packages:
sudo apt-get update
sudo apt-get install git wget flex bison gperf python3 python3-pip python3-venv cmake ninja-build ccache libffi-dev libssl-dev dfu-util libusb-1.0-0
- Download ESP-IDF:
mkdir -p ~/esp
cd ~/esp
git clone -b v5.4.2 --recursive https://github.com/espressif/esp-idf.git
- Install toolchains:
cd ~/esp/esp-idf
export IDF_GITHUB_ASSETS="dl.espressif.com/github_assets"
./install.sh
- Configure environment variables:
Add the following line to your.bashrc, then restart the terminal:
alias get_idf='. $HOME/esp/esp-idf/export.sh'
2. Compiling the LED Blink Example
- Clone the example and enter the blink directory:
cp -r ./esp/esp-idf/examples/blink/ ./
cd blink/
- Activate ESP-IDF:
get_idf
- Set the target and open menuconfig:
idf.py set-target esp32c2
idf.py menuconfig
Set the Blink LED type to RGB
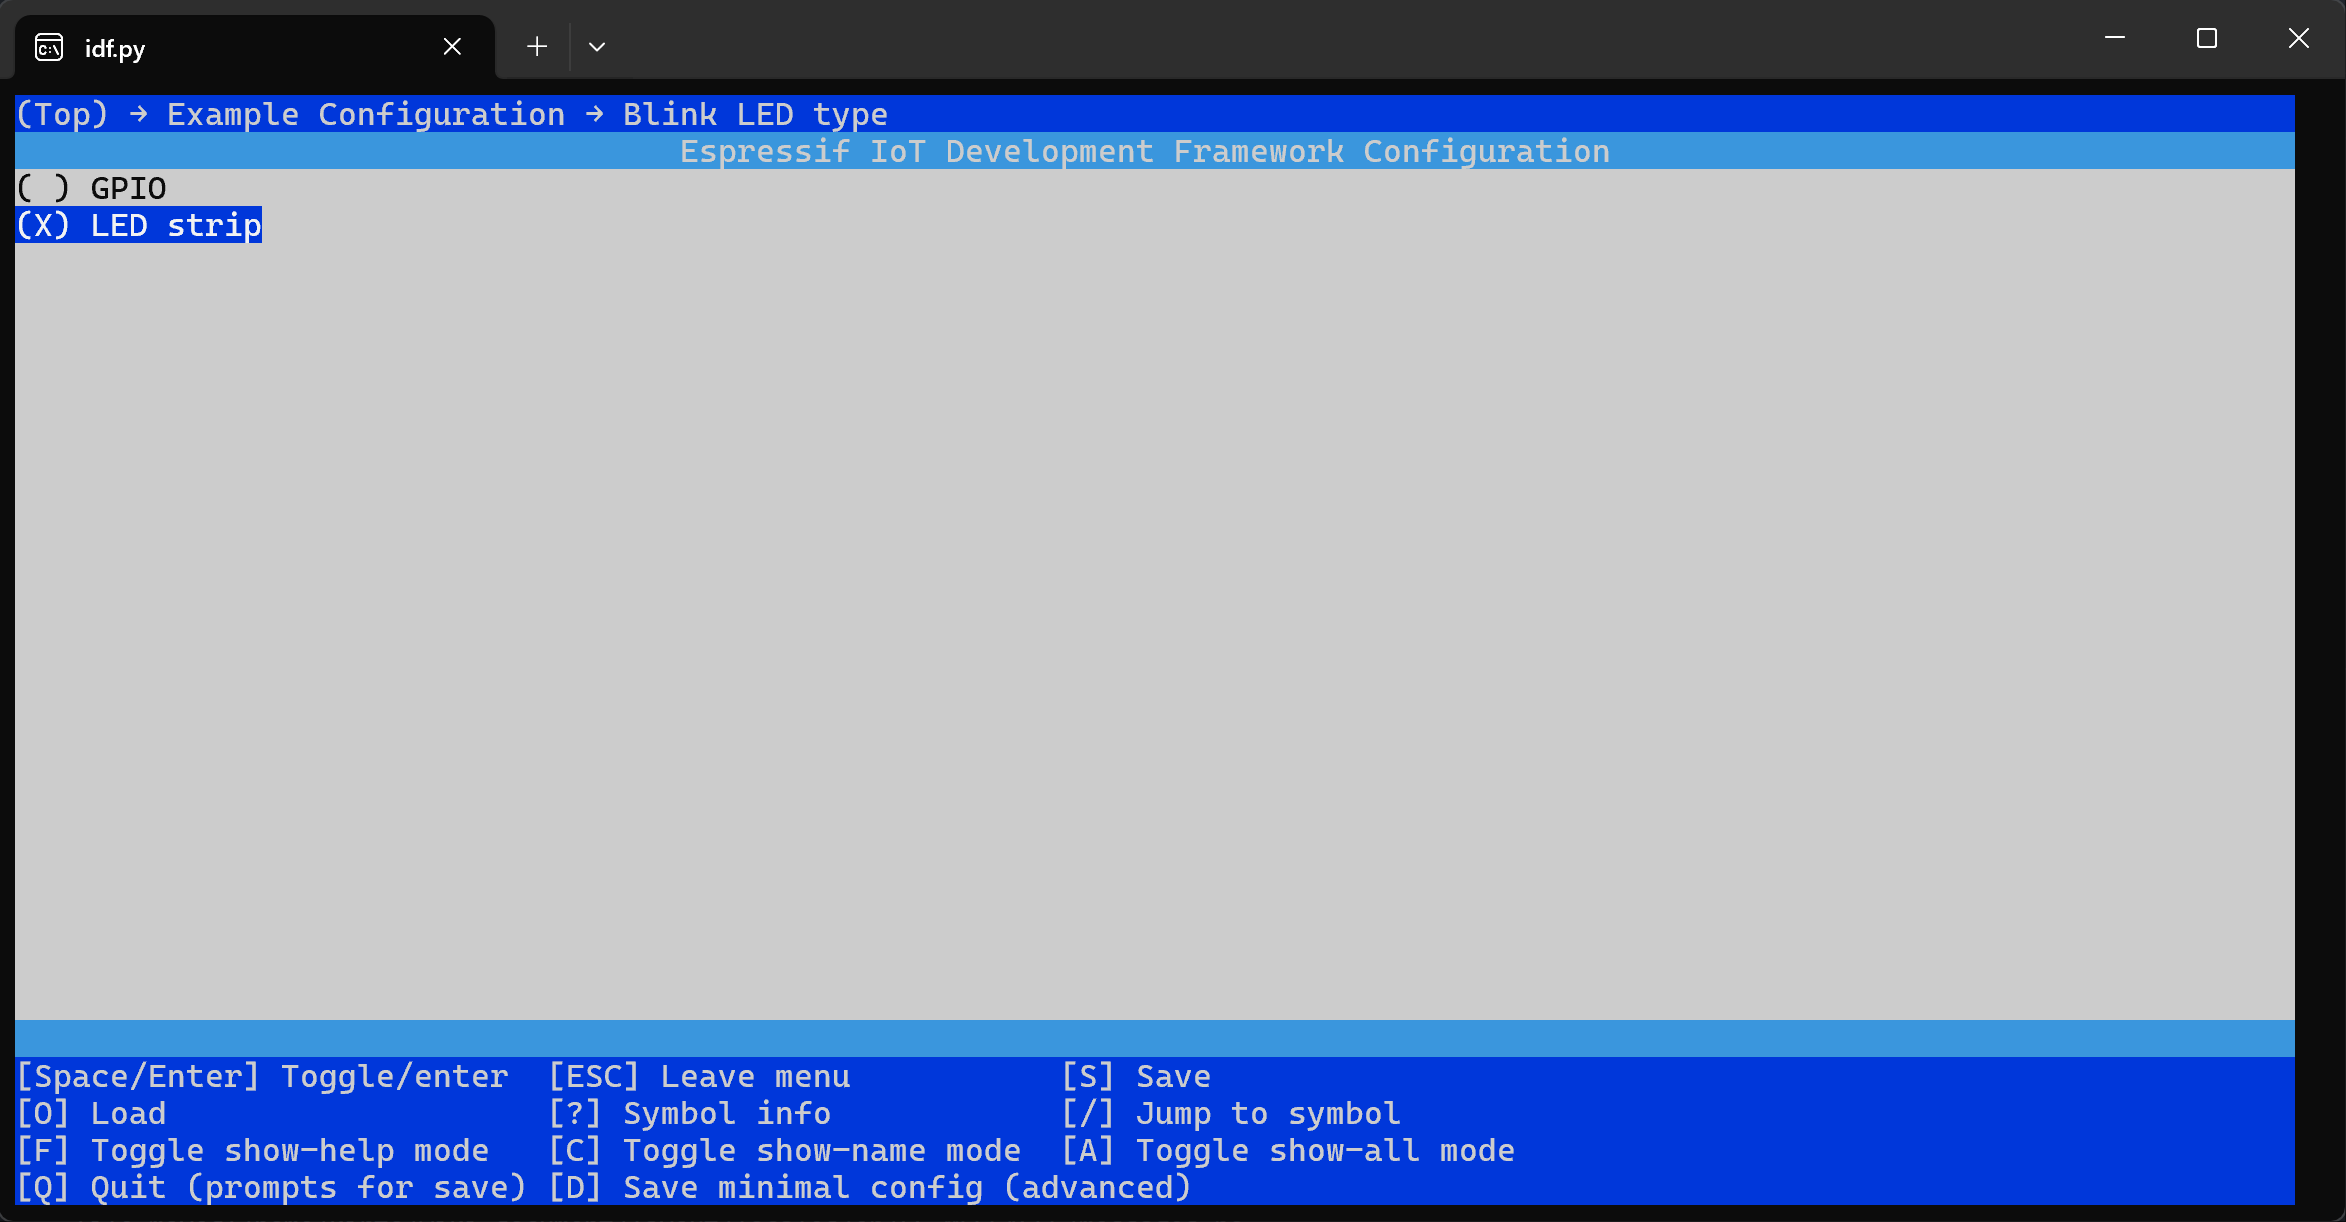
Set the LED GPIO to IO6

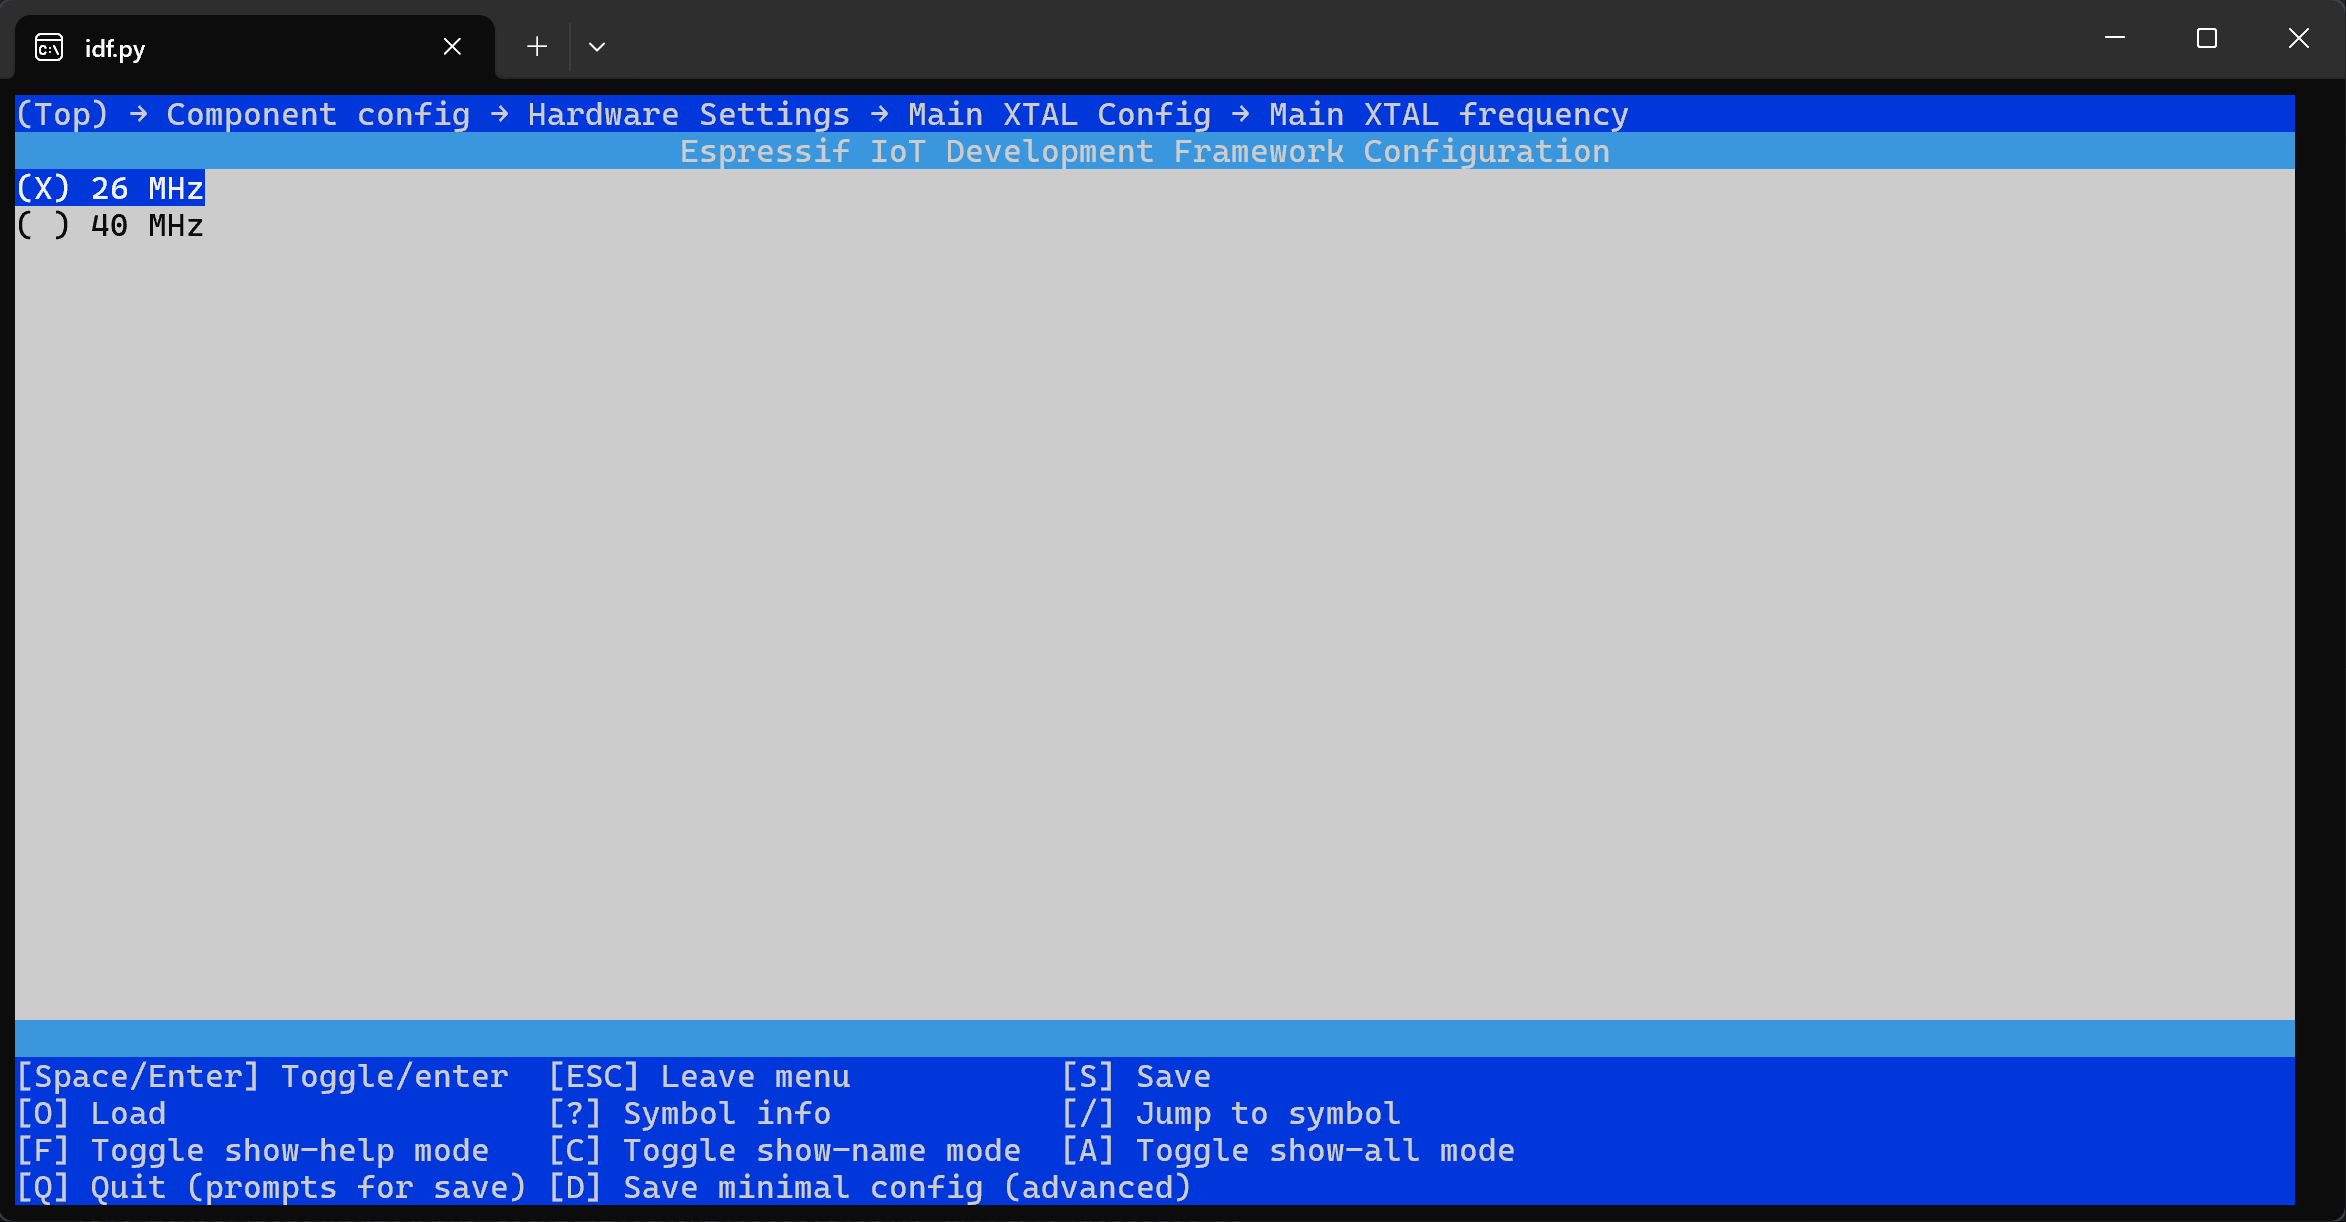
⚠ Important: The module uses a 26 MHz crystal, so you must change the XTAL setting:
Component config → Hardware Setting → Main XTAL Config → Main XTAL frequency = 26 MHz
- Build blink:
idf.py build
Connect the WT9932C2-TINY to USB and mount it into WSL using WSL-USB-GUI.
Flash the firmware:
idf.py flash -p /dev/ttyACM0
⚠ If you get a permission error, run:
sudo chmod 666 /dev/ttyACM0
3. Result
You should see the on-board RGB LED blinking white light.